Brake fade rarely announces itself in the paddock. It shows up at the end of a familiar braking zone, when the pedal gets longer, the car needs more distance, and confidence disappears exactly when the session is getting good. Learning how to upgrade brake cooling means treating airflow as part of the brake system, not as an accessory added after the fact.
For Audi, BMW, Volkswagen, and Mercedes performance platforms, brake cooling can be one of the highest-value track upgrades available. More air at the rotor reduces peak operating temperatures, helps pads maintain a consistent friction level, protects seals and fluid, and extends consumable life. The right setup is application-specific, though. A duct package that works perfectly on an MQB Golf R may be poorly suited to a lowered G8X BMW with a different wheel, tire, and suspension package.
Start With the Actual Heat Problem
Before buying ducts, identify what is overheating. Brake fade is often blamed on rotors when the real issue is old fluid, a street-oriented pad compound, undersized calipers, or a driver carrying too much speed into the brake zone. Cooling improves the system’s ability to shed heat. It does not turn an unsuitable brake package into a race-ready setup.
Pay attention to the symptoms. A soft or sinking pedal usually points toward fluid that has exceeded its temperature range, air in the system, or excessive caliper heat transfer. A firm pedal with reduced stopping force is more likely pad fade. Blue rotor faces, cracked drill holes, crumbling dust boots, and tapered pad wear all indicate that temperatures are moving beyond what the current package can reliably handle.
For a street car that sees occasional autocross or short track sessions, high-temperature fluid, proper pads, and fresh rotors may be enough. For repeated lapping, high-speed circuits, heavier vehicles, sticky tires, or increased horsepower, dedicated airflow becomes far more valuable. An RS3, TTRS, M car, or tuned MQB platform can build serious speed between corners. The brake system has to reject that energy every lap.
How to Upgrade Brake Cooling the Right Way
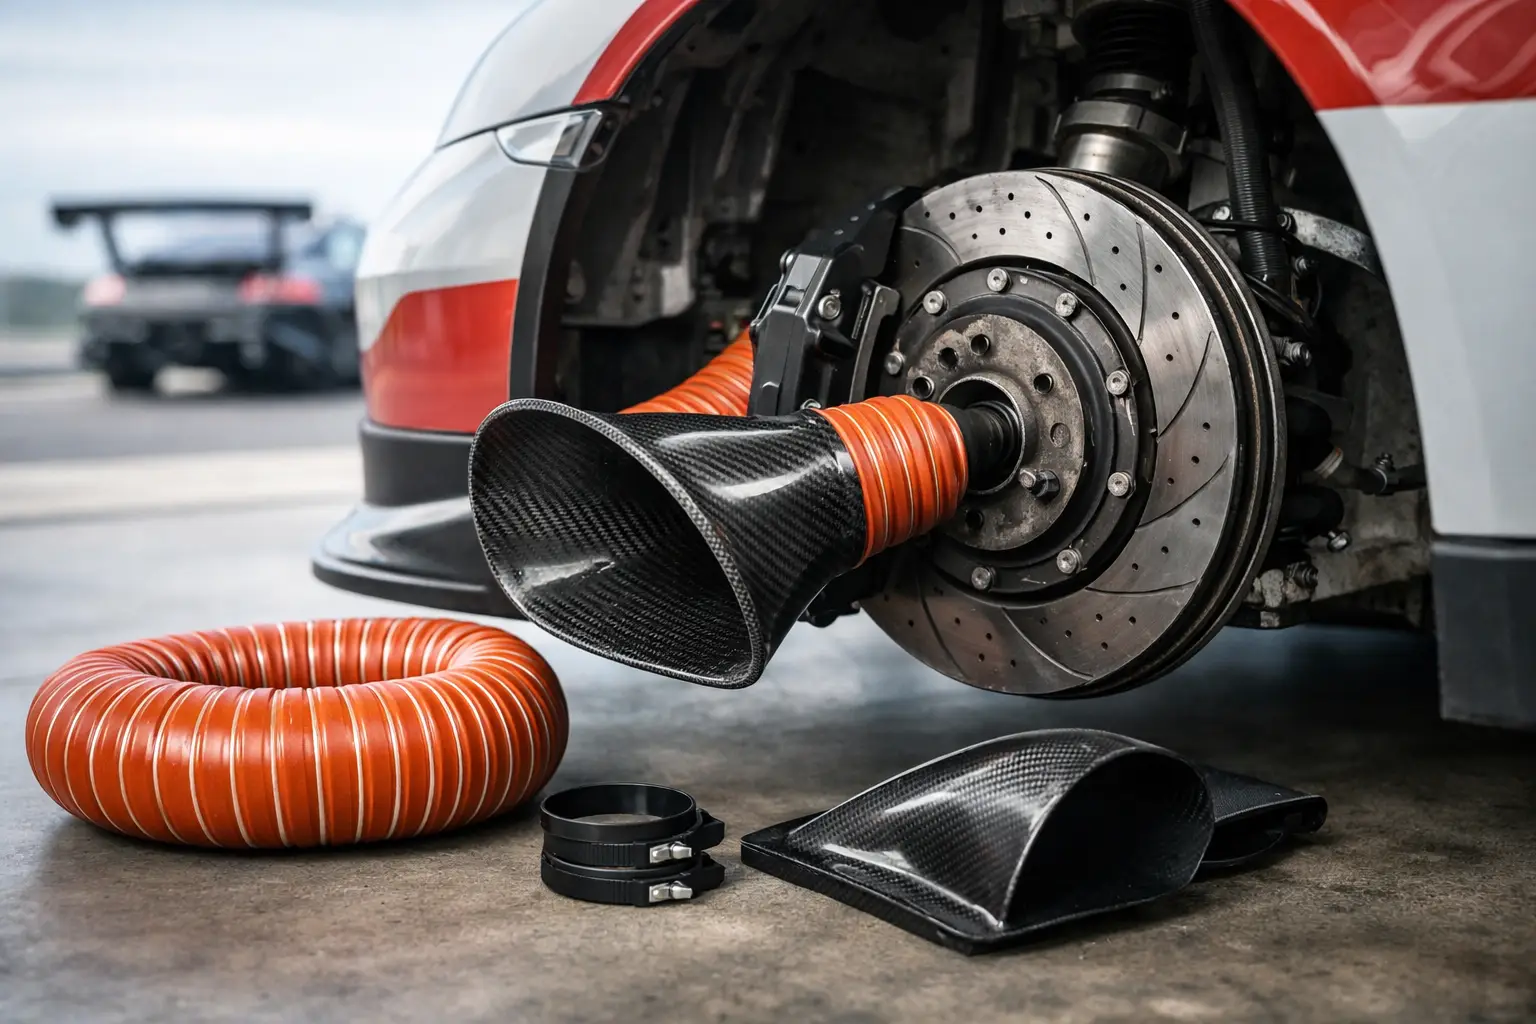
A proper brake cooling system has four connected parts: a clean air source, a duct inlet, heat-resistant hose, and a backing plate or rotor guide that directs air into the rotor vanes. Restrict any section and the entire system loses effectiveness.
The objective is not simply blowing air at the caliper. The most effective designs feed the center of a vented rotor. Internal vanes pull the air outward through the disc as it rotates, carrying heat away from the rotor and reducing the heat transmitted to the pads, caliper, fluid, and wheel bearing area.
Choose an Inlet That Sees Real Airflow
The front bumper is the usual starting point because it sees the highest pressure air. Factory fog-light openings, brake ducts, lower grille areas, and purpose-built bumper inlets can all work. The best location depends on the chassis and the specific bumper installed.
Avoid routing a hose to a cavity that looks open but receives little direct airflow. Likewise, do not block the primary radiator, intercooler, oil cooler, or transmission cooler to create a brake duct. On high-output European cars, engine and charge-air cooling are already working hard. Brake cooling should complement the vehicle’s thermal system, not rob airflow from another critical component.
A shaped inlet or properly sized scoop is generally more effective than an open hose tucked behind the bumper. It captures air more consistently at speed and gives the hose a cleaner path. For cars used primarily on the street, consider water exposure and debris. An aggressively low inlet can collect standing water, rubber marbles, and road debris if it is not protected or positioned carefully.
Use the Right Hose Diameter and Material
Three-inch hose is common for serious track cars because it moves substantial airflow without becoming impossible to package. Some compact chassis or tight bumper openings may require 2.5-inch hose, while larger race applications can benefit from 3-inch or 3.5-inch systems. Bigger is not automatically better if the hose kinks, rubs the tire, or cannot connect cleanly to the backing plate.
Use high-temperature brake duct hose designed for the job. Standard shop hose, dryer ducting, and thin universal tubing can collapse under vacuum, tear from suspension movement, or soften near hot brakes and exhaust components. Quality silicone or reinforced brake duct hose costs more, but it survives the environment that destroys budget materials.
Route it with smooth bends and as little excess length as practical. Every sharp turn adds restriction. Keep the hose clear of the tire at full steering lock and full suspension compression, not just while the car is sitting on a lift. Secure it with proper clamps, P-clamps, or chassis-specific mounts rather than zip ties alone.
Feed the Rotor, Not Just the Wheel Well
Backing plates are where a brake cooling upgrade becomes effective. A well-designed plate mounts securely near the hub and aims airflow into the rotor’s center channel. This uses the rotor as an air pump, which is far more efficient than spraying the outer rotor face or filling the wheel well with turbulent air.
Fitment matters here. The plate must clear the rotor, wheel barrel, caliper, brake lines, ABS wiring, and suspension components throughout the steering range. It also needs to match the rotor diameter and caliper arrangement. A universal plate may be workable for a fabricated track build, but a chassis-specific kit usually provides better duct angles, stronger mounting, and fewer clearance problems.
Be cautious with rotor shields. Removing a factory shield may create room, but it can also expose ball joints, boots, and wiring to more heat and debris. Some upgraded backing plates replace the shield function while adding a duct inlet. That is usually the cleaner solution.
Match Cooling to the Rest of the Brake Package
Airflow cannot compensate for mismatched components. Start with a high-quality racing or track-day brake fluid with an appropriate dry boiling point, then bleed it correctly and service it on a schedule that reflects use. Fluid that was fine for street driving may be compromised after a few high-temperature sessions.
Pad choice is equally important. A street pad may offer low noise and low dust, but it can lose friction when repeatedly pushed beyond its temperature window. A true track compound typically handles more heat and offers a firmer, more repeatable response, though it may produce noise, dust, and increased rotor wear on the road.
Rotor design also changes the equation. A larger or thicker rotor has more thermal mass, while a quality two-piece rotor can reduce unsprung weight and offer better vane design. Slotted rotors can help clear pad gases and maintain a fresh friction surface, but slots are not a substitute for ducting. Cross-drilled rotors may be appropriate for certain street-performance applications, yet sustained track use can accelerate cracking around the holes depending on the rotor design and operating temperature.
If your car is routinely exceeding the limits of its factory front brakes, consider whether a big brake kit or larger OEM-based conversion is the more appropriate foundation. Cooling is most effective when the caliper, pad volume, rotor mass, fluid, and airflow all support the same duty cycle.
Installation Checks That Prevent Expensive Problems
Brake ducts live in a hostile area of the car. They see steering movement, curb strikes, heat cycles, tire debris, and high-speed airflow. After installation, inspect the system with the wheels off and the car safely supported. Turn the steering from lock to lock and check clearance at ride height. If possible, cycle the suspension or verify clearance with the car loaded on the ground.
Look closely at the hose near the tire shoulder, sway bar, axle, control arm, and coilover spring. A hose that is barely clear in the garage may contact under braking and compression. Any rubbing will quickly turn into a shredded hose and potentially a damaged tire.
Make sure the backing plate does not touch the rotor. Even light contact can create noise, heat, and metal debris. Confirm that fasteners are secure, brake lines are not stretched, and no mounting point relies on thin plastic that can fatigue over time.
After the first track session, inspect everything again. Look for melted hose sections, loose clamps, heat discoloration, and rubber marks. This is also the right time to evaluate pad wear and rotor condition. A well-designed system should show more consistent pad wear and fewer signs of extreme heat, but it will not eliminate normal track maintenance.
Validate the Upgrade at the Track
The best result is consistency, not a dramatic visual change. A brake cooling system should help the pedal remain stable deeper into a session and reduce the tendency for the car to lose braking performance after repeated heavy stops. It may also improve pad and rotor life enough to offset much of the initial investment.
If you have access to temperature paint, thermal stickers, or an infrared thermometer used immediately after a cooldown lap, compare readings before and after the upgrade. Record ambient conditions, pad compound, tire choice, session length, and driver pace. Raw temperature figures are useful, but patterns matter more. A setup that lowers peak rotor temperatures while keeping left-to-right temperatures close is doing its job.
Do not chase the lowest possible brake temperature. Pads need to operate within their intended range, and overcooling can reduce performance in cold conditions. For most track-driven street cars, the target is controlled, repeatable heat management that keeps every brake component inside its useful operating window.
The strongest brake cooling upgrades are the ones you stop thinking about after installation. Build the airflow path around your exact platform, verify every clearance point, and let the car deliver the same confident braking on lap eight that it had on lap two.